How To Set Up GA4: 5 Easy Steps
Do you want to set up Google Analytics 4 (GA4) on your website but don’t know where to start? In this guide, we break down 5 steps to start setting up this powerful analytics tool!

Google Analytics 4 (GA4) is a powerful web analytics tool that delivers valuable data used to create insights and make decisions. In July 2023, Google Analytics 4 replaced Google’s Universal Analytics to give website developers a more comprehensive look at how people use their websites by giving them access to a wider scope of data to work with.
For those who want to take full advantage of everything this platform has to offer, this guide on how to set up Google Analytics 4 will teach you everything you need to know about getting started and connecting your website to the tool.
Step-by-step guide to set up GA4
Let’s break down everything you need to do to set up GA4 on your website:
1. Creating an account and property
Head to the Google Analytics website and click Create an account to create an account. If you already have an account, then log in. In the center column and select the Create Property button. This will lead you to the property creation page.
Name your property when the prompt tells you to. Name it something short and self-explanatory, like [Your company/website’s name] GA4, for example. Ensure you have input the relevant reporting time zone and country as well as the currency you work with.
When you click Next, you must answer some questions before moving forward. One of the questions will ask you about your business objectives. There are three choices that will affect the type of reports you receive in your interface after setup. The choices are Raise Brand Awareness, Examine User Behavior and Get Baseline Reports. The simplest option is Get Baseline Reports for reports with more general data. Then click Create.
2. Setting up Data streams
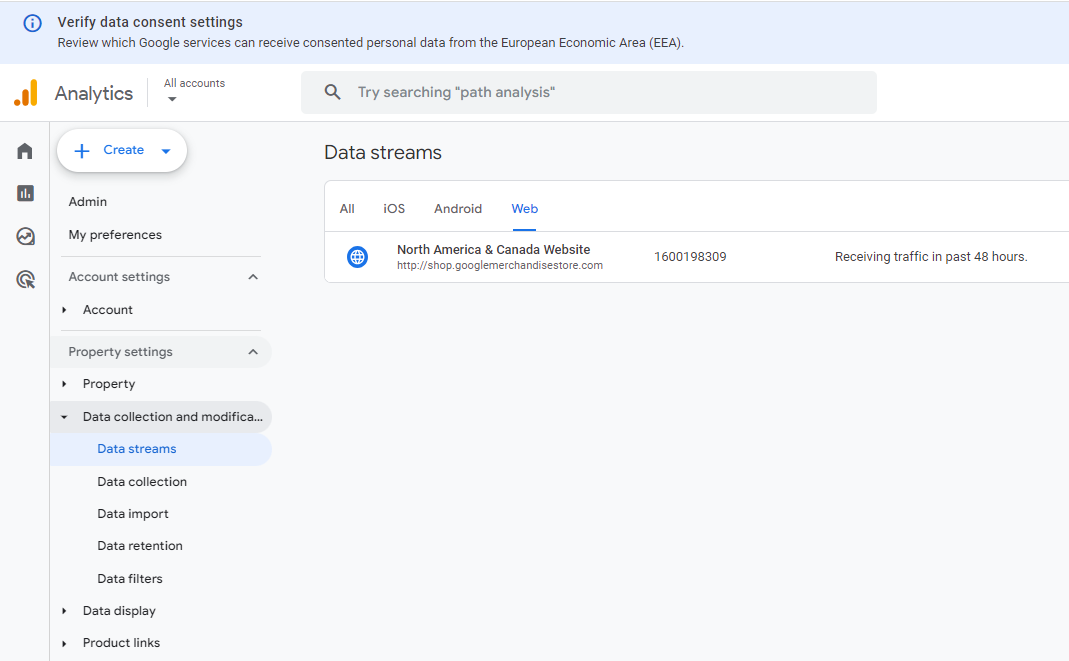
Under the ADMIN section, click on the Data Streams option. Input your website’s URL. HTTPS is the default protocol already selected, so you can include your URL without that part. When setting up your data streams on GA4, you can disable or enable Enhanced Measurement. This feature was made to help marketers get as much information and document as many events as possible without needing to work with developers or Google Tag Manager.
Enhanced Measurement is enabled by default and tracks these events:
- Scrolls
- Page views
- Site searches
- Form events like submissions
- File downloads
- Outbound link clicks
- Video views and engagement
You can enable and disable these events as you see fit, depending on your needs and what you what included in your reports. Just click the toggle buttons in the Enhanced Measurement section to do this.
3. Install Google Analytics 4
You can install Google Analytics 4 in one of three ways:
The first way is to use it using a Google Analytics plugin. This is a good idea for people using popular content management systems like WordPress, Shopify or Squarespace. You need to make sure your chosen plugin supports your content management system. Some of these will require a Measurement ID. You can find your ID by going to the Admin panel in Google Analytics, then go to Data Streams and select your set-up web data stream. Your ID is in the top right corner and starts with G-.
The second method is to install GA4 using the native tracking code. If you work with a website with no native GA4 integration or cannot support GA4 plugins, you can ask the developer to install native GA4 tracking code into the site’s source code. In the Data Stream menu in the GA4 admin panel, you can click View tag instructions and select the View tag instructions button. Select Install Manually to copy the code that needs to be placed in the source code.

The third installation option is to use Google Tag Manager (GTM). This method gives you more flexibility and power when managing tracking codes. You need to install GTM on your website before you can start using it. Select your data stream and copy your Measurement ID. Place your ID into the Google Tag Manager field, which you can find under the Tags menu, selecting New and then choosing Google Tag. In the Tag ID text field, input or paste your ID. Then, find your new Google tag in the tags menu.
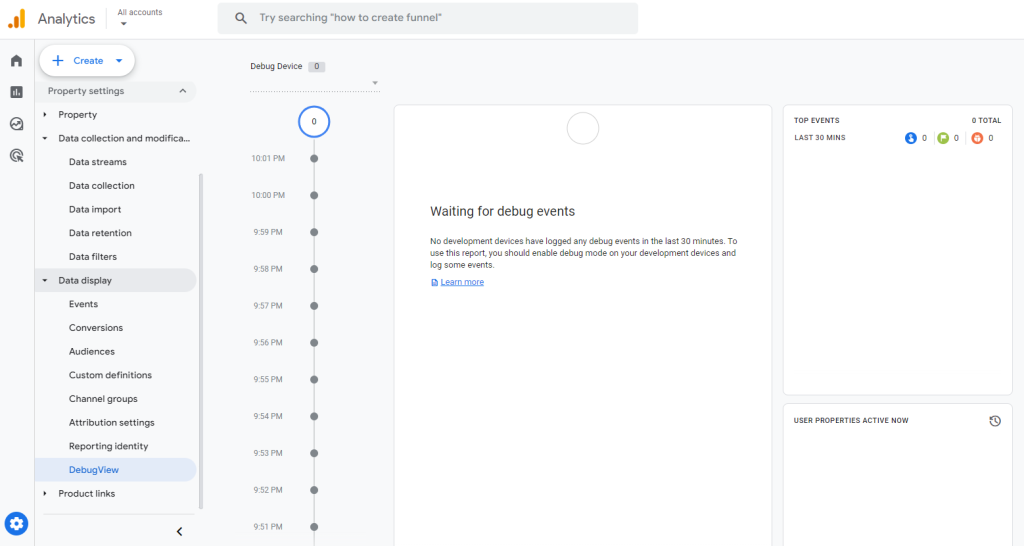
4. Use the DebugView
When using the first or second method to install GA4, you need to test it. After installation, go to your GA 4 account and choose the DebugView option in your Admin tab. You will see something displayed here in debug mode. You need to enable this. You can also install the Google Analytics Debugger as a Chrome plugin from the Chrome store for free. If you installed GA4 using the third method, then DebugView data will automatically be visible.
Click on everything you see in the DebugView to see a list of parameters. Click on each individual parameter will help you find ways of removing the bugs.
5. Get access to the Realtime reports function
On the left-hand sidebar on your UI click on the Realtime option. This will give you a list of data being used in your reports. GA4 gives you the chance to see this data on a more detailed, granular level.
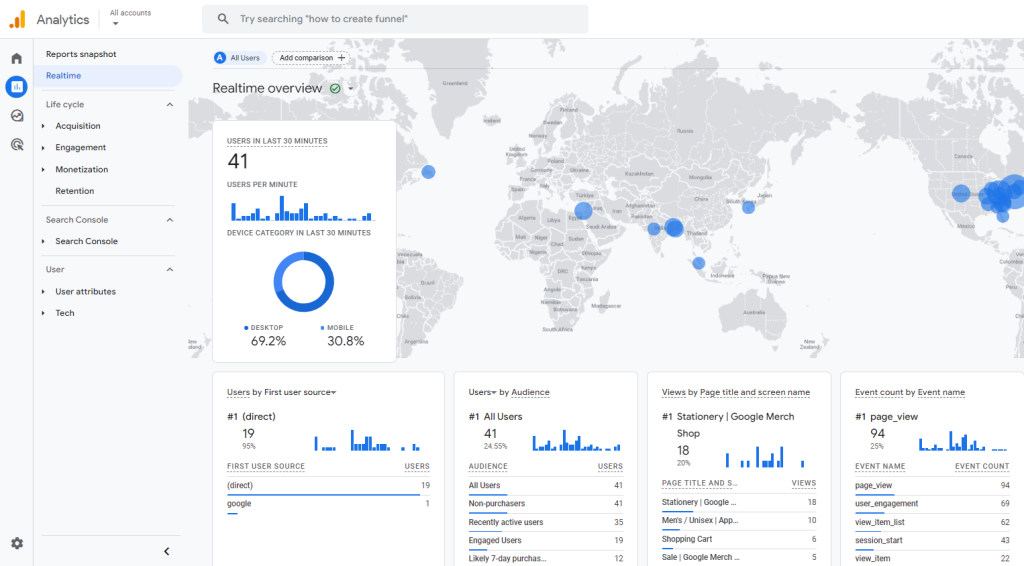
You will be presented with a map and a list of cards containing traffic sources, the most common events and the number of users on your site from the last 30 minutes. You can also take snapshots of individual users using the view user snapshot button. You will be able to see a list of all the events this user has taken and click on them to see more information.
Revolutionize your website with Grade My Website
Google Analytics 4 is a great tool to set up on your website so you can start tracking valuable data and make changes that matter. Learning how to action the insights you gain from your data is another important task. That’s where Grade My Website comes in. We are experts in all things related to digital marketing and our web analytics services can help your website flourish.
Contact us to learn more about what we can offer you and how we can help you make your website go above and beyond your wildest expectations.
Google Maps SEO: 10 Tips to Rank Higher on Google Maps
What is Google Maps SEO? Google Maps SEO (search engine optimization) is the process of making your business visible on Google Maps when users search for related keywords to your business. As an internet user, you have likely done a Google search to find a local store selling the product you’re looking for near you. […]
Read moreHow To Check Google Ranking?
Learning how to check Google ranking lets you know how much exposure your website receives for specific keywords. Checking your website’s Google ranking may help you identify areas of strengths and weaknesses you can improve on to rank higher on the SERPs and boost your return on investment (ROI). Read on for more information about […]
Read moreWhat Is Google EEAT and How To Optimize Your Site?
Over the years, digital marketers have determined the key elements that produce a high-ranking webpage. But little is known about the Google algorithm that puts webpages at the top of the SERP. However, Google has provided helpful guidelines to ensure quality pages match user intent. Explore what Google EEAT is and what you can do […]
Read moreHow To Add Google Analytics to WordPress?
Google Analytics is one of the most efficient web analytics tools offered by Google for businesses and individuals who want statistics on a specific website’s performance. Further to this, it provides you as the site owner with data on visitor insights such as how they access the site, the channels they use, top keywords used to […]
Read more